Breeding Cockatiels
As many pet owners have multiple birds invariably the situation arises where 2 birds of the opposite sex decide they want to breed. Sounds great doesnt it! It will be fun watching eggs hatch and seeing cute babies grow up. Think again!
To Breed or not to Breed
Breeding pet cockatiels can be a rewarding experience for some, but it’s not always the best decision for every pet owner. There are several reasons why breeding pet cockatiels should be approached with caution or avoided altogether, especially for first-time breeders or those with limited experience. Below are some of the key reasons not to breed pet cockatiels:
1. Overcrowding
Your pet birds cage may be the perfect size for the birds you already have but how many more can the cage hold? Cockatiels can have 4 or 6 babies on average per clutch and once those babies leave the nest , the cage that comfortably fitted 2 birds now has 6 or 8 birds in it with the young ones all keen and eager to take flight. They cannot be separated from the parents until they are weaned at around 10 – 12 weeks of age unless you plan on taking them from the parents and handraising them.
2. Health Risks for the Female
Breeding is physically demanding on female cockatiels. Laying eggs and raising chicks can take a toll on her body, leading to potential health problems such as egg binding (where an egg gets stuck inside the bird), malnutrition, and stress. Egg-laying also poses a risk of reproductive issues as the bird ages. Continuous breeding or the stress associated with multiple breeding cycles can impact the females health..
3. Potential for Poor Genetics
Not all pet cockatiels are of ideal breeding quality, especially if they come from pet stores or non-professional breeders. Breeding birds with unknown or poor genetic backgrounds can lead to offspring with health or behavioral problems. Without proper genetic knowledge of the birds’ lineage, you may unintentionally pass on genetic disorders or undesirable traits to future generations.
4. Unplanned or Inexperienced Care
Breeding cockatiels requires knowledge and preparation, as it is not just about getting eggs and raising chicks. The care of the eggs, the incubation process, and the feeding and socialization of chicks all require significant time, effort, and experience. Inexperienced breeders may find themselves overwhelmed by the challenges and stresses that come with raising a clutch of cockatiels, which can lead to neglect or poor welfare for both the parents and the chicks.
5. Behavioral Issues in Pet Birds
Breeding cockatiels can sometimes change their behavior, particularly if they are kept in a breeding environment. Cockatiels that have bred or are in breeding mode can become more territorial or aggressive, both toward other birds and even towards humans. This can make them harder to handle or enjoy as pets. In some cases, pet birds may become stressed or overly protective of their nest, which can lead to aggressive behavior or damage to their feathers and health.
6. Increased Responsibility and Time Commitment
Raising baby cockatiels requires a lot of attention. In the wild, both parents play a role in caring for and feeding the chicks. In captivity, the breeder is responsible for providing food, warmth, socialization, and other care for the chicks until they are old enough to leave the nest. This is a significant time commitment and may interfere with the breeder’s other responsibilities or hobbies. It can also be stressful, especially if issues arise with the chicks or the parents.
7. Risk of Overbreeding
Some pet owners, especially those new to bird breeding, may fall into the trap of overbreeding. This can be due to pressure from selling the offspring or a lack of awareness of how often birds should be bred. Overbreeding can have negative effects on the health and well-being of the birds, particularly the females, who may end up laying eggs too often without adequate time to recover.
8. Ethical Concerns
Ethical concerns regarding breeding birds for profit, without proper care or attention to the animals’ well-being, may lead to negative outcomes for both the birds and the pet breeder. Many people breed their pets thinking it is a quick way to earn a few dollars without enough knowledge to do what is best for the birds. Invariably once sold the new owners contact experienced breeders wanting help and advice for problems they are finding in their new pet. While most breeders are happy to help for the sake of the bird it is a very unfair practice for us to have to spend our time and money fixing the result of someone elses mistakes.
9. Financial Cost
Breeding cockatiels involves expenses, including the costs of maintaining a proper breeding environment, providing food, supplements, and potential veterinary care for both the parents and the chicks. While some breeders might sell the chicks to cover costs, this doesn’t always happen, and there can be significant financial losses if things don’t go as planned.
Conclusion
Breeding pet cockatiels requires a significant amount of knowledge, experience, and commitment. The decision to breed should not be taken lightly, and it is important to consider the welfare of the birds involved and the responsibility of caring for chicks. For most pet owners, especially those who are not professional breeders, adopting a pet bird from a shelter or rescue is a much more ethical and responsible choice. If you’re considering breeding cockatiels, it is important to fully understand the requirements, challenges, and ethical implications of the decision.
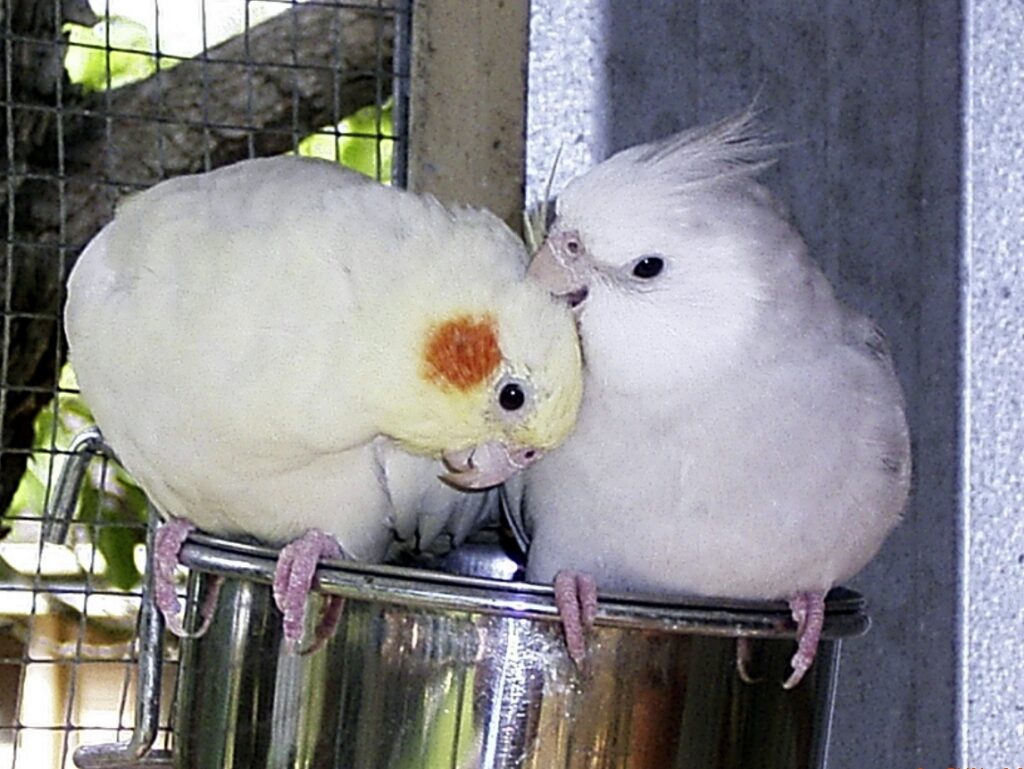
So you have decided you want to breed cockatiels. The first thing you need to organise is a good breeding pair of birds and a suitable cage and breeding setup.
1. Choosing your breeding birds
The art of successful breeding is to start out with healthy birds from good, proven breeding lines and then bring out the best in them. It is this second point that is the main challenge for us as breeders to achieve. Experience, skill, intuition and resourcefulness will always be rewarded with achieving overall good results. Good health is the most important thing to look for when choosing your birds for breeding. Healthy birds breed healthy chicks, this is your ultimate goal so a little thought needs to go into deciding whether or not a bird is suitable to breed. Age is the next most important factor to consider. Birds will breed at a very young age but usually the results are disappointing and it can affect their future breeding success. It is far better to be patient, wait those extra few months and don’t allow your birds to breed until at least 18 months of age. In the long run you will have far better breeding results and the birds will benefit by not being overbred too early.
Many people who want to start breeding make the mistake of thinking their pet bird will make a good breeding bird. They think all they have to do is buy a bird of the opposite sex and stand back. Unfortunately it doesn’t work that way. While some pet birds will go on to become good breeding birds most will not. Usually they are too imprinted on their human mates to ever accept a bird as their new partner. This then becomes a bit of a disaster and if it has been your first introduction to breeding it can be very off putting. It really is best to keep your pet birds as pets and if you decide you want to start breeding buy yourself a pair of suitable birds.
Not all birds are compatible so it is a good idea to give your birds a chance to get acquainted before you introduce the breeding box to them. Otherwise the hen will most likely start to lay eggs before the cock bird is ready and you will only achieve lots of clear eggs. It is very important that both the cock and the hen are in sequence with their breeding routine. The correct order of events would be that the pair become bonded by being together, after you feel confident that they are fairly well bonded introduce the nesting box , the cock bird should then work the box i.e.. Chew all around the hole, go inside and rearrange the shavings, and only when he is satisfied he has it as it should be will he let the hen go in the box. In the meantime mating should have been taking place and all being well within a very short time you should see the first egg appear. They may not start to sit until after the third egg has been laid, then they will take turns with the cock bird sitting all day and the hen sitting all night. There will always be slight variations to this as every bird is different but generally speaking if all the above procedures have taken place you are well on your way to achieving your first nest.
2. Aviary
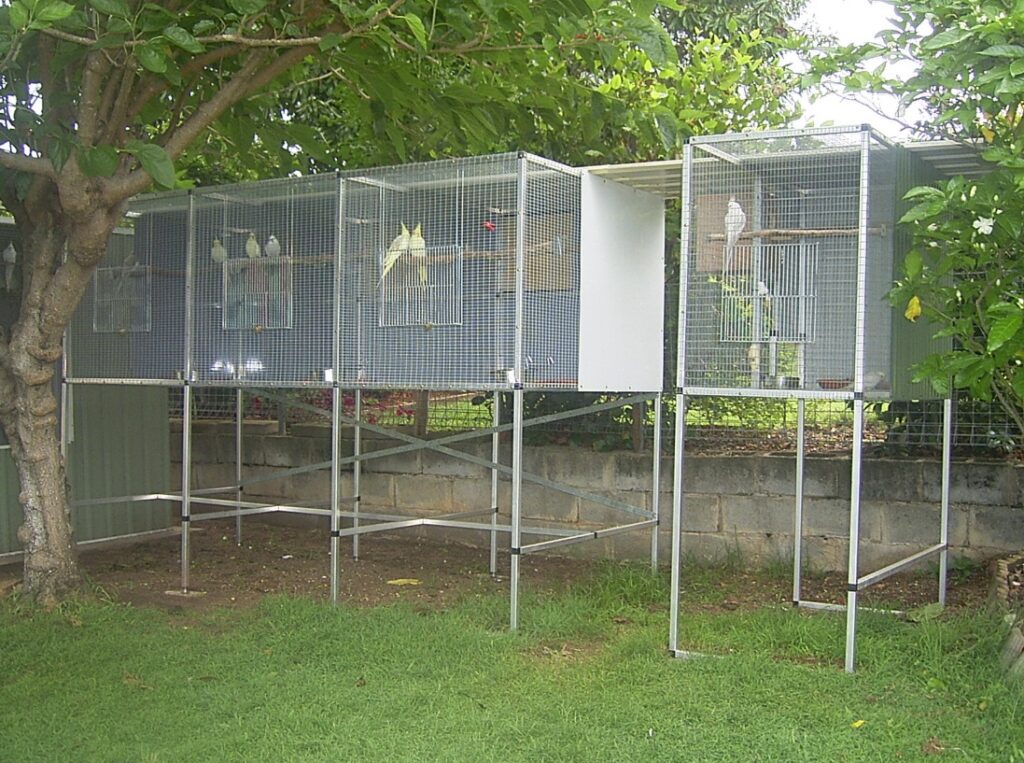
Because cockatiels are quite prolific breeders they really need a reasonable amount of room in which to breed. While your breeding pair may look to have plenty of room in a small cage just picture how crowded it will get when 5 or 6 chicks fledge. A flight approximately 2 metres long and 1 metre wide will give your birds a bit of room to move. In the case of suspended aviaries, 1 metre high, or conventional 2 metres high. If you can go bigger fine but if space is a problem this is an adequate size for one breeding pair. Location of the aviary can also effect your breeding success. Your birds need a certain amount of peace and quiet in order to go about their business of sitting eggs and raising chicks.
They can’t do this if they are constantly being disturbed by kids, dogs, cats, other birds or anything that distracts them from their job. Of course there will always be those one-off factors that are beyond our control. Hopefully though your birds feel secure enough in their situation that after a bit of excitement they will quickly resume normal duties.
3.Nest box
No doubt there are many variations on what cockatiels will breed in , both natural logs and home made or manufactured plywood boxes. The standard nesting box for a pair of cockatiels is approximately 300mm high x 220mm wide x 200mm deep. The entrance hole should be 60mm in diameter and be 80mm from the top of the box with a piece of doweling for perching. If it is smaller the birds will sometimes refuse to enter. Suitable material should be placed in the bottom i.e.. Pine shavings, and a dusting of a carbaryl based lice powder i.e.. Skatta 7 or a spray with Vetafarm AIL will hopefully prevent any mite infestation during breeding. The positioning of the box can be quite important. It needs to be in a position where the birds can feel quite safe and relaxed about going to nest. If you have set your birds up but they won’t go anywhere near the box chances are they don’t like something about where you have put it and the best idea would be to change it to a different position.
4. Feeding
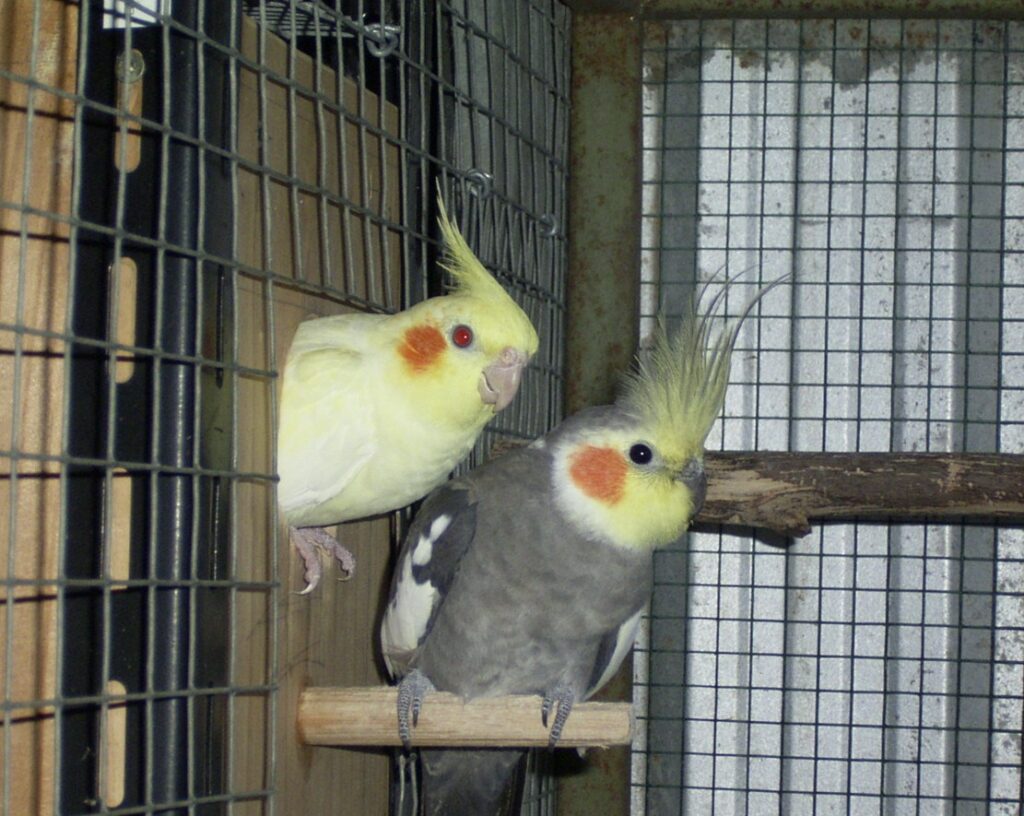
Now is the time to start increasing your birds food supply to allow them to build up in preparation for the upcoming chicks. Also as we all know how finicky cockatiels can be , if they haven’t previously had access to a variety of foods they will have time to get used to them before the chicks arrive. Sprouted seed is very good , pigeon mix ,wheat, mung beans etc soaked for a few hours drained and allowed to sprout slightly, rinsed thoroughly and presented to your birds will always be well received. It is also a good idea to sprinkle a vitamin supplement i.e.. Avian Vitalizer over the sprouts or bread to give your birds extra vitamins and minerals. Vegies such as celery, silverbeet, endive, bok choy, Sweet corn , carrot or whatever your birds enjoy, are really good for them at this time.
Of course it goes without saying a good supply of quality seed , pellets, fresh water and calcium in the form of cuttlefish or calcium bells must be always available. You may get a bit of wastage at this stage but as soon as the chicks start to hatch you will be kept busy running backwards and forwards with extra supplies to help your birds feed their demanding babies. Obviously any left over food must be removed and discarded every day. At this time it is very important to provide your birds with their soft foods and vegetables early in the morning as this is when they are busy feeding the chicks, so forget about sleeping in as your birds will be hanging on the wire watching for your arrival. It is a good idea if possible to top up their supplies of greens and soft food later in the day as well as they go into the feeding frenzy to fill the chicks up for the night.
The more effort you are prepared to put in at this stage can make all the difference between your birds sailing through with 5 or 6 healthy chicks or struggling along with some of the chicks failing through lack of food and maybe only 1 or 2 of the strongest surviving. The parent birds also suffer greatly if they have to try and feed their chicks on limited resources.
5. Hatching
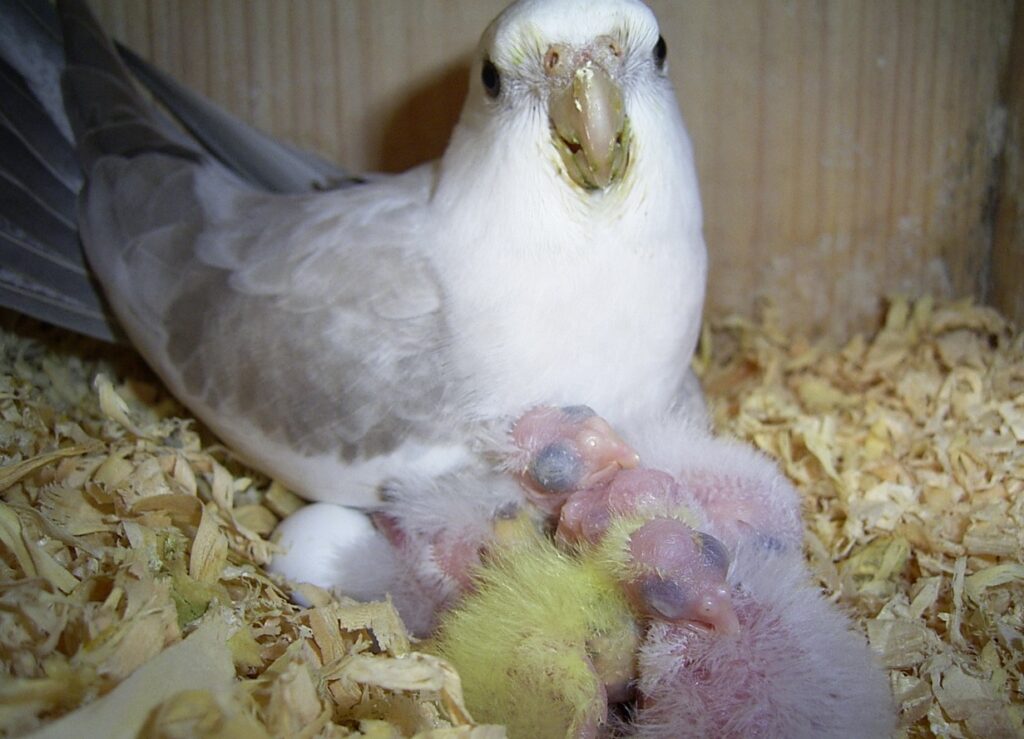
If you are familiar with your bird’s behaviour it is pretty easy to tell when the chicks are near to hatching. More rapid changeovers start to take place as the hen will emerge more often to feed and also to bath so that she can go back in to the nest wet and create some humidity so that the egg shells are not too hard and dry thereby making it more difficult for the chicks to hatch. Anytime from 16 days from when the first egg was laid little chips will start appearing in the surface of the egg as the chick prepares to emerge. Nothing beats the sight of that little ball of fluff rolling around in the nest, however it is important to give your birds some space and don’t be tempted to interfere to much with the chicks at this stage. As long as everything is going well a quick look while the parents are out feeding should be enough .
Depending how many chicks hatch you may have to assess if there is too greater distance in age the smallest chick may need assistance either by supplementary feeding or moving to another nest where like sized chicks are. Ideally the chicks are all of a comparable size and receive equal amounts of food from the parents. Daily inspections are a good idea as the chicks progress just to keep an eye on them and to act quickly if any problems arise. Normal healthy chicks should have empty crops first thing in the morning and should quickly be filled up by the parents and then topped up throughout the day until late in the afternoon if you get a look at them should have lovely crops chock a block full to get them through the night. Then the process starts all over again the next day. A healthy chick should have good skin colour i.e. a nice healthy pink, should be quite bright and able to hold it’s head up high to be fed. If you want to put leg rings on the chicks around day 10 is usually the time, this can vary a bit from chick to chick.
So far so good, and 99% of the time there will be no problems from here on in. However, there is always the chance that first-time parents will be a little slow off the mark. If they don’t seem to be feeding the chicks properly (you can check this by seeing if their crops are as full as they should be), you may have to make a quick decision to hand feed them, so be prepared to have some hand-rearing food ready. If you have to take the chicks out and find that they are cold, always warm them up first before you attempt to feed them.
Another thing to look for is in the larger nests, is that the last chick is getting fed properly and that the bigger chicks aren’t getting his share. You may have to top this chick up with a little food once or twice a day. Or, if you have other birds breeding with chicks the same size, you may be able to swap them around or just foster them out.
6. Fledging
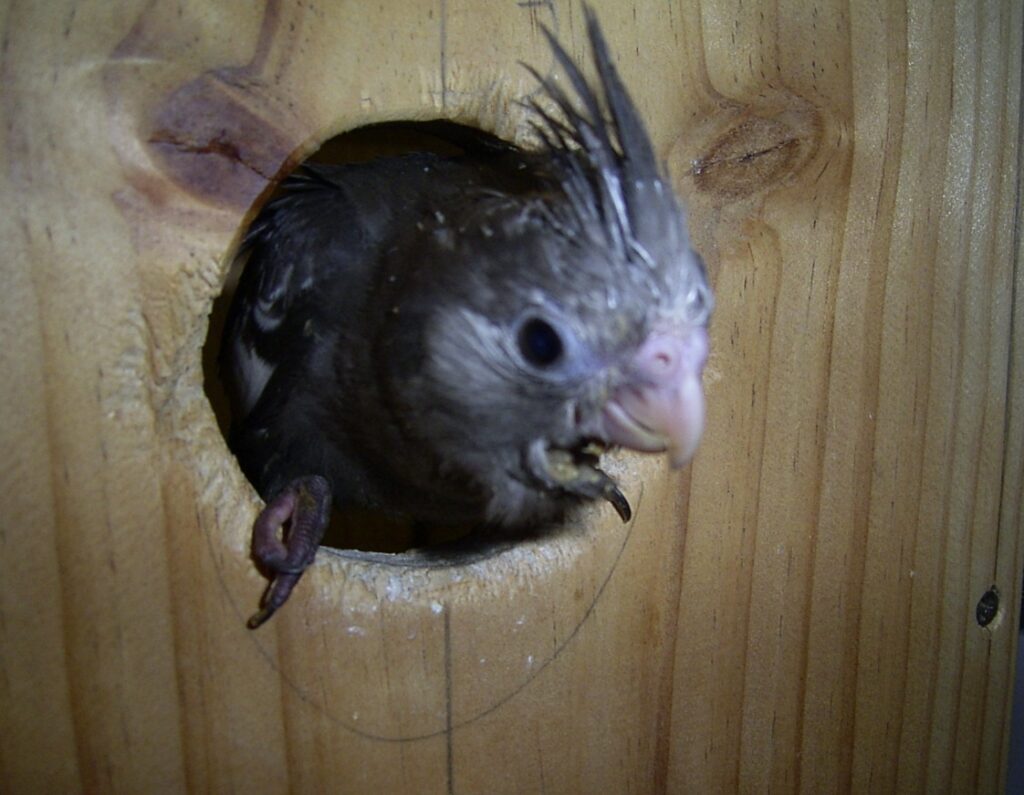
All being well your chicks will start to fledge at around 4 – 5 weeks of age. Usually you can see them peeking out of the hole a few days beforehand . They usually drop back out of sight when they see anybody coming. Finally they will take the big plunge, sometimes with a helping shove from Mum or Dad. Once they are out of the box the parent birds start the long process of teaching them how to eat by themselves. This is fascinating to watch as the parent birds fly backwards and forwards encouraging the chicks. However the chicks are still dependant on the parents for around another 4 – 6 weeks and care should be taken not to remove them too early as they may not be weaned and able to feed themselves. The parent birds will usually start to lay again as soon as the first chick starts to fledge and the whole process starts again.
Assuming that the buyer purchases a healthy bird with good potential, what are some of the things that can go wrong?
1/ The pairings are not very compatible, resulting in one or more of the following situations: an unwillingness to breed at all; or one bird makes an effort but is not well supported by the other; and/or the pair goes through the motions but do a poor job – they just don’t make a good team
2/ When the nestbox is introduced, the hen is keen to breed but the cock is not ready, and before he starts to work the box she has already laid eggs. When this happens, usually the eggs are not fertile.
3/ The cock works the box but the hen won’t go through the entrance hole even though it’s large enough. Eggs on the floor of the cage are often a sign of this being the case. Some hens require an extra-large entrance hole, and some will only enter the box through the top (you need to take the lid off). In the wild, cockatiels often nest in broken tree limbs, the entrance of which may be the same dimension as the nesting cavity.
4/ For no obvious reason the pair is not happy with some aspect of the new environment and just will not breed, despite there being no problem with other birds breeding in that establishment.
5/ The birds go to nest and all seems well but they suddenly abandon their eggs before hatching. Possible causes are red mites (you might not see them), night frights, irregular food supply, insecurity, e.g. other birds worrying them, disturbances from rodents, possums, etc or too much human interference.
6/ The birds seem to be incubating well but the eggs appear to be infertile or dead in the shell. The hen may have had a night fright that you are unaware of and left the nest long enough for the embryos to die. If the embryos are in the early stages of development, the eggs will appear as if they were infertile, otherwise they will present as dead in shell.
7/ The chicks seem to be doing well but one day you find that they have all died for no apparent cause. This can happen particularly in cold weather with small chicks, if the hen gets a night fright and leaves the nest.
Another variation of the above is when chicks become chilled but don’t die and the parents won’t feed them. Cold chicks will not feed – they must be warmed up first. Once a chick has become cold and lethargic, it won’t beg for food from the parents and the parents won’t feed young that don’t respond with the usual begging routine. This is nature’s way of ensuring the most vigorous birds survive. It is futile to blame the birds for not feeding their chicks when they are just responding to natural instincts.
8/ The parents do a poor job of feeding their chicks or even abandon them. It may be that the food supply is inadequate or irregular. Birds are creatures of routine and are stimulated to breed well when conditions are right and there is a good food supply. In the wild, birds may abandon nests when continuity of food supply is not good. The most successful breeders provide their birds with a good supply of suitable rearing food on a routine and consistent basis. It is also important to educate breeding stock to eat the correct rearing food before they have chicks, otherwise they may just ignore it. This is just one example of the many reasons why cockatiels may neglect their offspring.
9/ The parents attack and injure young in the nest. Birds are capable of getting angry and frustrated and venting their emotions on their young (just like some people). Too much human interference or distractions that upset the bird’s routine and sense of security can cause this.
10/ Sometimes, young birds just get it wrong through lack of experience or perhaps because the cock is not sexually mature and the eggs are infertile. When this happens the birds can get themselves into a negative breeding cycle where one problem leads to another and all their efforts are unproductive. Skilled intervention at this point may quickly put the birds into a positive routine where their efforts are rewarded and they more rapidly acquire positive incubation and parenting skills. Two examples of dealing with this problem are given here:
- The cock is not sexually mature and the eggs are infertile but the parents are incubating. If possible, give these birds some fertile eggs to foster. They will then rear chicks and be in a positive routine, and next time the fertility will probably be right.
- The eggs are fertile and the hen is sitting well whilst the cock is on and off the nest all the time, though after a week or two he settles down. Unfortunately, the embryos all died in the first week! However, if the breeder has the resources, it is a good idea to either place their eggs in an incubator or under other birds whilst at the same time giving the young pair some infertile eggs to sit on until they settle into a steady incubation pattern. Once they are settled and incubating well, their original eggs can be returned and no harm has been done (it may be helpful to keep a few infertile eggs on hand for such purposes).
These examples illustrate a few of the problems that may be encountered when breeding cockatiels. Such problems do not necessarily mean that the individual birds involved are destined to be poor parents or breeders. It is not at all unusual for some top breeding birds to get off to a shaky start with their early nests. If we are experiencing problems and we characteristically blame the birds, bad luck, the seller and whatever else comes into mind, we are overlooking our own important contribution in providing the optimum environment, conditions and management required to assist the birds in realising their full breeding potential.
Hand Rearing
Hand-rearing can be a very rewarding experience, but it can also be a nightmare if you find yourself in an emergency situation needing to feed abandoned chicks and not having the first clue regarding what to do.
This situation can be avoided with a little bit of forward thinking and also preparation. If you are going to breed birds, at some point you will find yourself in the position of needing to be able to hand-rear a chick or chicks. It could be that the parent birds reject their chicks; you could have a death of one or the other parent birds; or any number of other situations could arise. If you have put some thought into what you will do if an emergency arises, your likelihood of a successful outcome is greatly increased.
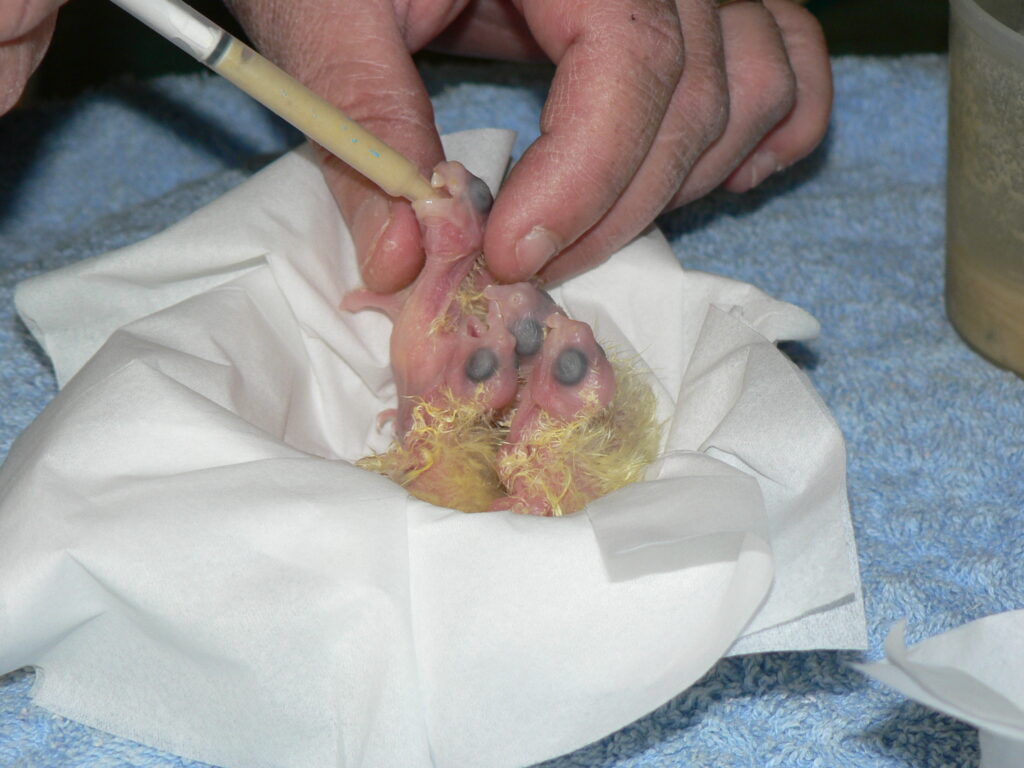
Ideally your first experience with hand-rearing should be a pre-planned event. Chicks that may be suitable for pets could be removed from the nest at around 2 weeks of age. You will need to have a suitable container to keep them in, something around the same dimensions as a nest box will suffice at this stage. Shavings or paper towel will need to be replaced daily in the bottom of the box. At 2 weeks of age the chicks will need around 5 feeds per day. These feeds need to be scheduled starting in the morning around 6 or 7 am then 4 hourly until 10 or 11pm leaving an 8 hour break overnight. You need to leave around 4 hours between feeds to allow the chicks crops to empty before feeding again. If you are feeding the chick the correct amount it should easily digest it all in 4 hours. If this is not happening, you are either feeding too much or a chick has a problem with its crop and it is not emptying at a normal rate.
It is very important to use a suitable hand rearing food especially designed for parrots. Egg & Biscuit on its own is not a suitable hand-rearing food as it does not contain everything a baby bird needs to grow and flourish. There are several good quality hand-rearing mixes on the market. Vetafarn Neocare is particularly good and is used by many of the professional “hand-rearers”. This product can also be kept (dry) in the freezer for a longer life, which can be very handy when you need some urgently. You need to follow the manufacturers instructions for feeding but generally the best idea is to mix up the required amount, depending on how many chicks you are feeding, and combine the dry food with some boiled water. Bring the food up to the required temperature and maintain a stable temperature by using the double bowl method (Container with hand rearing mix sitting in a slightly larger container filled with hot water to keep the food at optimum feeding temperature.) Check once you have added the water to the formula that the density is something like a yoghurt consistency. Nice and smooth, but not too thick and not too thin. Method of feeding is really a personal preference, using either a small spoon with bent up sides or a small syringe.
As long as the food gets into the chick without too much ending up all over the place is the main thing. Try to clean up any food that gets onto the feathers as you go along, rather than waiting until its sets rock hard and is difficult to remove. Once you have done a bit of hand feeding, it is something you get a feel for as to the method etc. The most important thing is to get the food to the chick at a good temperature. Food that is too hot will burn the crop, but food that is too cold will also cause problems, with the crop slowing down. Chicks will often refuse cold food, even if they are hungry. I usually feed with the mix between 38 and 40C . Generally a chick of around 3 weeks would eat approx 10mls per feed. It is best not to overfeed as this too can cause crop problems.
From the age of about 4 to 5 weeks you will find that the chicks begin to attempt to fly. This would be the stage at which they would leave the nest box if they were still with the parent birds. This is the time that you can move them from their “holding box” into a cage. Once they are in a cage you can start introducing the chicks to seed, water and other foods (while still maintaining their regular hand feeds). Initially they will play with these new foods more so than eat them, but gradually they will get the hang of it and start to become more interested in eating on their own. Also provide the chicks with a calcium supplement such as cuttlebone or a calcium bell.
As the chicks get a bit older, you can gradually decrease the number of feeds and encourage them to start experimenting with other foods like seed, sprouts, greens, sweet corn etc. Millet sprays are also a good way to get young chicks used to eating seeds. Generally from around 4 to 5 weeks, feeds would drop to 3 per day. At around 6 weeks 2 feeds per day, and then hopefully by 7 to 8 weeks they are just about fully weaned and may only need one top up feed each day. Naturally this can vary from chick to chick so you need to assess each chick’s individual needs. Chicks are usually easier to wean if there is more than one, as they learn from each other. If you are trying to wean a single bird you may need to be a bit more creative with things to tempt them to start feeding themselves. If the chick is a bit inclined to just sit on the perch and wait until you bring the next feed along, try removing the perch to encourage the chick to walk around, nearer the food on the floor of the cage. Usually by the time the chick walks through the foods you have provided, it will start to try them and hopefully decide they are worth eating.
Only when you are confident the chick is able to sustain itself without your help, is it considered to be fully weaned.
Emergency Situation Do’s & Don’ts.
The biggest mistake people can make is to try and feed a “chilled” chick. Imagine the situation. You find an icy cold chick abandoned by the parents but it is still alive. Its’ crop is completely empty so it is really a normal reaction to try and get some warm food into the chick quickly. Unfortunately this is more likely to hasten the chicks’ demise rather than help. The correct procedure would be to warm the chick up first, either in a purpose built hospital cage, or if this is not available, some type of warm environment i.e.. a hot water bottle, lamp etc. Be careful not to overheat. Give the chick a small amount of warm water (with some electrolyte solution if available) to assist with rehydration. Once you are confident the chick has returned to a more normal body temperature and is moving around, and hopefully looking to be fed, this is the time to feed it with some nice warm food. Observe how well the chick digests this meal before you feed again. If the crop doesn’t appear to be working too well it may be necessary to consult your avian vet.
It is very important when hand feeding chicks to observe good hygiene practices. Utensils need to be thoroughly washed after each feed. Keep the chicks nice and clean, as well as their environment. If you take these simple steps you will avoid many of the problems that may arise through bacterial contamination. The more time and effort you put into the process of hand raising a baby bird, the better the result will be.
Do not rush the weaning process. It is usually counterproductive and this sometimes makes it harder to wean the bird than if you take the time to gradually decrease the hand feeding. Give the chick plenty of time to get used to the idea of feeding itself. Hand-rearing does take time, and is not something you can rush. So before you take on the job, realise the size of the commitment you are making and be prepared to do it for as long as the chick needs your help.
Reach Out To Us
Interested in adding a new feathered family member learning more? Reach out to us by clicking on the button below.